
Documentation
Troubleshooting and Maintenance
Diagnose licensing, missing modules, saving, rendering, uploads, themes, providers, and production data.
Start with evidence. Record the failing product, view, browser, and exact action, then run diagnostics before changing several settings at once.
Who this is for
Administrators, support teams, and developers
What you will achieve
You can isolate the failing layer and provide a useful support report without damaging working configuration.
Before you begin
- Administrator access.
- A reproducible test case.
- Permission to inspect browser Console and Network tools.
Run QA & Diagnostics first
Where to go: Overview > Quick access > QA & Diagnostics
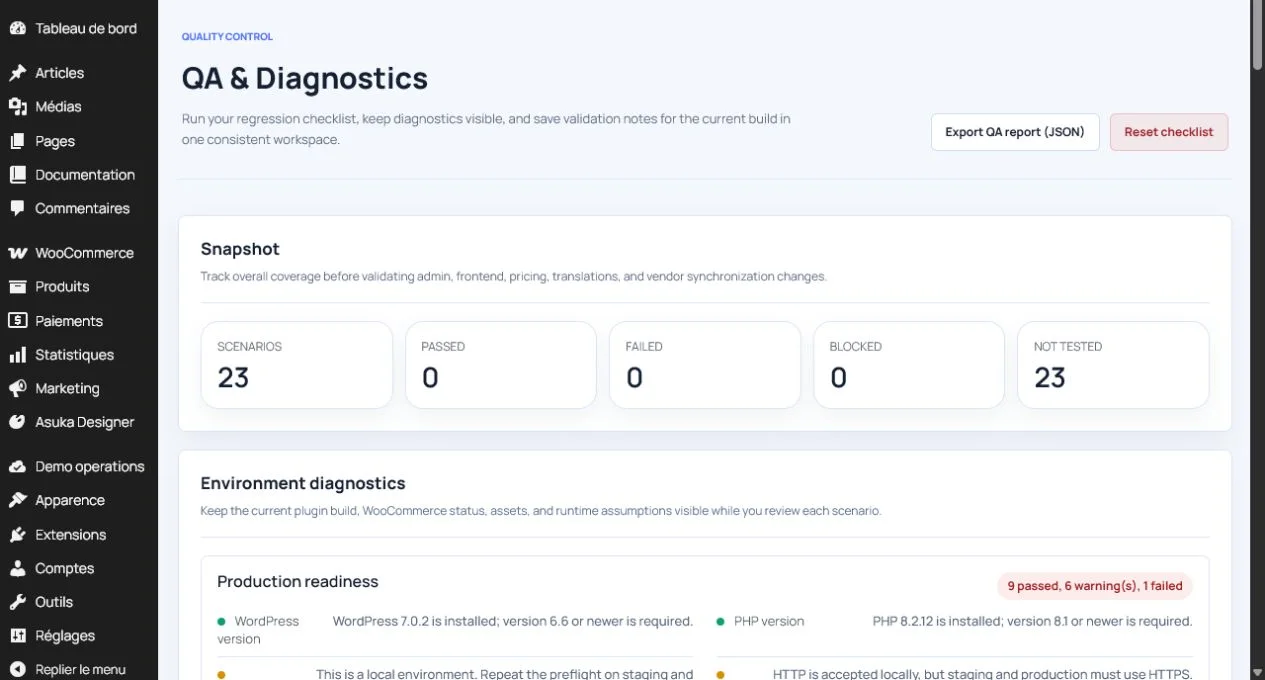
- Run configuration, runtime, license, asset, product-binding, and commerce checks.
- Record failed check names.
- Export or copy the report before changing configuration.
- Retest after one focused correction.
The designer does not appear
- Confirm the product configuration is published.
- Confirm the WooCommerce product is bound to it.
- Check the page for a designer mount element.
- Inspect missing JavaScript, CSS, image, or GLB requests.
- Test with a default WooCommerce theme.
- Clear WordPress, optimization, CDN, and browser caches.
A premium module is missing
- Confirm Settings reports Connected.
- Confirm the licensed domain and site slot.
- Confirm the signed token contains the feature.
- Confirm the matching add-on file exists in plugin assets.
- Confirm product permissions and template placement.
- For provider modules, confirm the provider credential.
Views disappear after save
- Check WordPress validation notices.
- Save and wait for the request to finish.
- Reload immediately and compare view count.
- Confirm the latest document/state payload was posted.
- Remove obsolete custom calls that bypass the shared renderer API.
- Test a newly created configuration to separate record corruption from runtime failure.
Avoid this: Do not publish a configuration until a save/reload cycle preserves every view.
A 3D tool says the renderer is not loaded
- Confirm the active view is 3D.
- Wait for the view-ready state.
- Check the Babylon bundle request.
- Check the GLB request and MIME type.
- Check WebGL2 availability and browser GPU errors.
Fonts or image providers are missing
- Confirm the shared asset is enabled.
- Confirm product Catalog filters include it.
- Confirm template and permissions expose the tool.
- For Google Fonts, verify the API key and saved font entry.
- For image providers, verify credential, entitlement, and network response.
- For custom fonts, verify file URL, MIME, CORS, family, weight, and style.
Uploads fail
- Compare plugin maximum size with PHP upload_max_filesize and post_max_size.
- Check WordPress media permissions.
- Check the file extension and real MIME type.
- For GLB, confirm the plugin MIME normalizer accepts the valid binary.
- For SVG, correct unsafe or unsupported markup instead of disabling sanitization.
The product blinks or selection drops
- Inspect whether the theme or page builder repeatedly replaces the mount node.
- Check hover overlays, tooltips, and selection rectangles for pointer interception.
- Confirm one designer instance is mounted.
- Disable unrelated optimization plugins during isolation.
- Record a short video with Console and Network errors.
Safe update procedure
- Back up database and uploads.
- Export important configurations and shared assets.
- Install the update on staging.
- Test one 2D product, one 3D product, one mixed product, cart, checkout, and production.
- Verify plugin and bundled designer versions.
- Deploy the exact tested ZIP and keep the previous ZIP for rollback.
What to include in a support report
- Plugin, WordPress, PHP, WooCommerce, browser, and operating-system versions.
- Configuration and WooCommerce product IDs.
- Exact reproduction steps and expected result.
- Diagnostics output.
- Relevant Console and Network errors.
- Screenshots or a short video.
- Whether the issue reproduces with a default theme and without cache/optimization.
Need to verify the result?
Run Asuka Designer > QA & Diagnostics, then repeat the customer workflow in a private browser window.