
Documentation
WooCommerce, Orders, and Production
Bind configurations, preserve design data through checkout, and prepare customized order items for production.
The WooCommerce integration links the visual designer to a sellable product and carries the validated design through cart, checkout, order, and fulfilment.
Who this is for
Store managers, fulfilment teams, and support staff
What you will achieve
A customized line item contains its preview, design state, price snapshot, configuration reference, and production status.
Before you begin
- WooCommerce is active.
- Product binding is enabled in Settings.
- A product configuration is published.
- A test payment method is available.
Bind a simple product
Where to go: WooCommerce > Products > Edit product > Asuka Designer
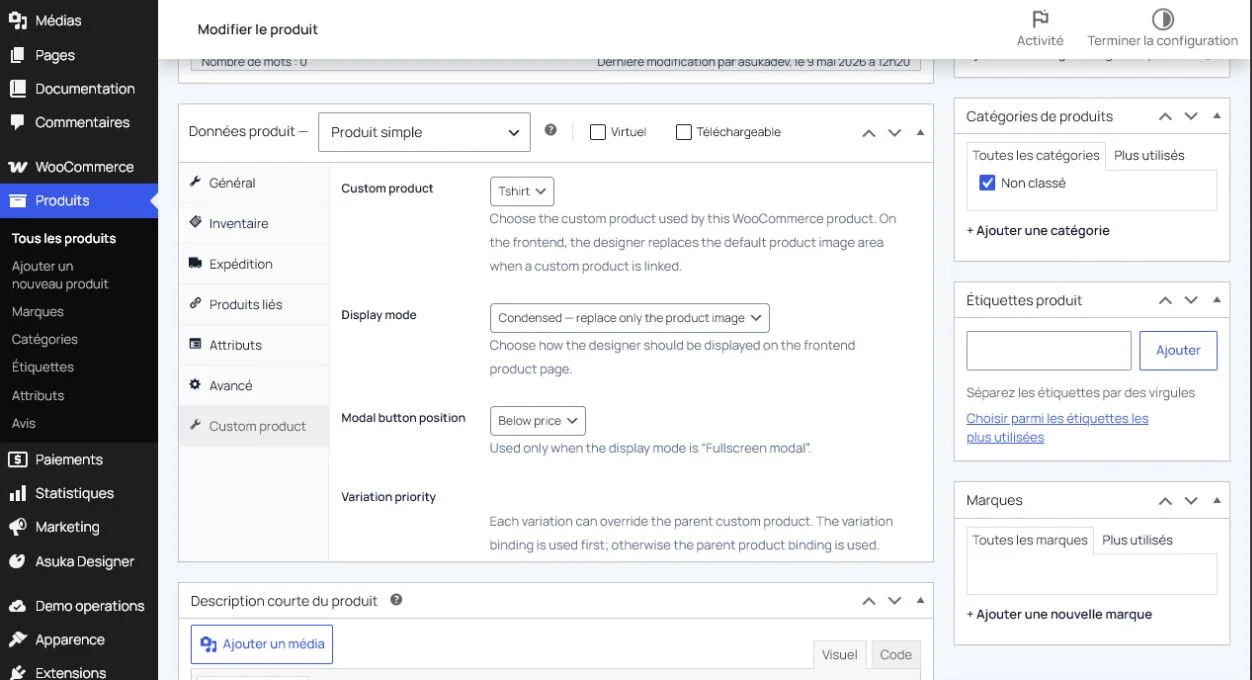
- Select the published configuration.
- Choose the display mode.
- Update the product.
- Open the public product page and confirm the designer mounts before add to cart.
Bind variable products
A parent configuration may be shared, or individual variations may override it when product structure differs.
- Configure the parent product first.
- Use per-variation overrides only when required.
- Change variations on the storefront and confirm the correct configuration loads.
- Verify price, stock, product variation, and design data remain associated.
Choose the display mode
- Condensed mode can replace or sit near the normal product gallery.
- Full-width mode gives the designer a dedicated product section.
- A modal workflow can open from a clear customization action near the price.
- The plugin provides a fallback when a theme omits standard WooCommerce gallery hooks.
Avoid this: Always test the production theme. Page builders and custom themes may render WooCommerce sections asynchronously or omit standard hooks.
Validate the customer journey
- Load the product in a private window.
- Create content in every required view.
- Change variations and printing options.
- Trigger one known validation error and confirm the message.
- Complete a valid design and add it to the cart.
Verify cart and checkout
- The cart shows an appropriate preview and customization summary.
- The design reference remains after refresh.
- Quantity changes recalculate price correctly.
- Classic checkout and WooCommerce Blocks preserve the same data.
- The validated server price is used for the line item.
Review the order
Where to go: WooCommerce > Orders
- Open the customized line item.
- Inspect its configuration and saved design reference.
- Inspect the preview and pricing metadata.
- Confirm the order remains readable when HPOS is enabled.
- Use the resume link only according to the customer-editing policy.
Use the Production workspace
Where to go: Asuka Designer > Commerce > Production
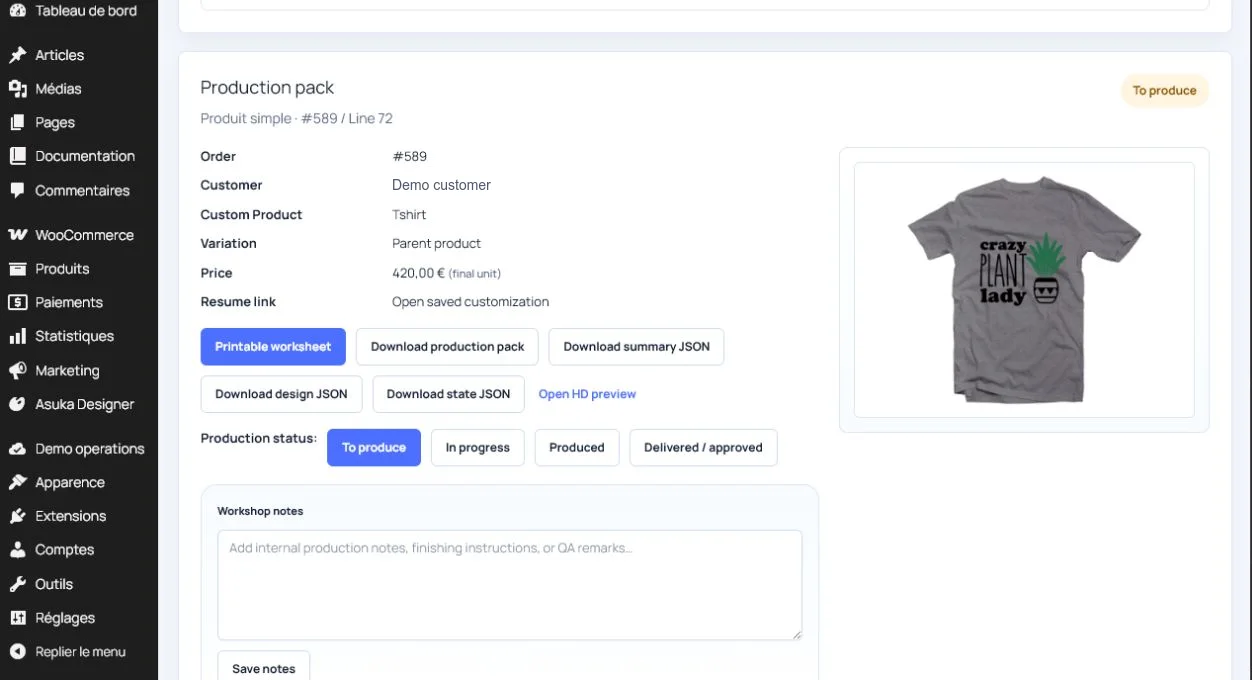
- Filter customized order items by status.
- Inspect the customer preview and exact design data.
- Check dimensions, DPI, colors, method, variation, and price.
- Add internal notes.
- Move the item through the production lifecycle.
- Download and inspect the production pack before manufacture.
Success check: A production operator can fulfil the order without reconstructing the customer design manually.
Need to verify the result?
Run Asuka Designer > QA & Diagnostics, then repeat the customer workflow in a private browser window.