
Documentation
Product Configuration
Build the product source of truth: views, initial state, permissions, validation, catalogs, templates, and pricing.
A product configuration is not a WooCommerce product and not merely a canvas. It is the complete set of rules loaded by the customer designer.
Who this is for
Product managers and designer administrators
What you will achieve
A stable, published configuration that survives save/reload and exposes only the intended tools and assets.
Before you begin
- Prepare the product media: 2D images or a GLB model.
- Decide which product parts and variations customers may change.
- Create the shared assets and printing methods you intend to expose.
Create the configuration record
Where to go: Asuka Designer > Products > Add Product Config
Use the title for internal identification. Keep the post in Draft while building and testing.
- Use a clear title such as “Classic T-shirt / Customer editor”.
- Avoid changing internal element, view, or variation IDs after saved customer designs exist.
- Publish only after the audit and storefront test pass.
Use the Product builder
Where to go: Main Product builder panel
The builder is the visual editor for views, product elements, variations, drawing areas, markers, scene data, and initial document state.
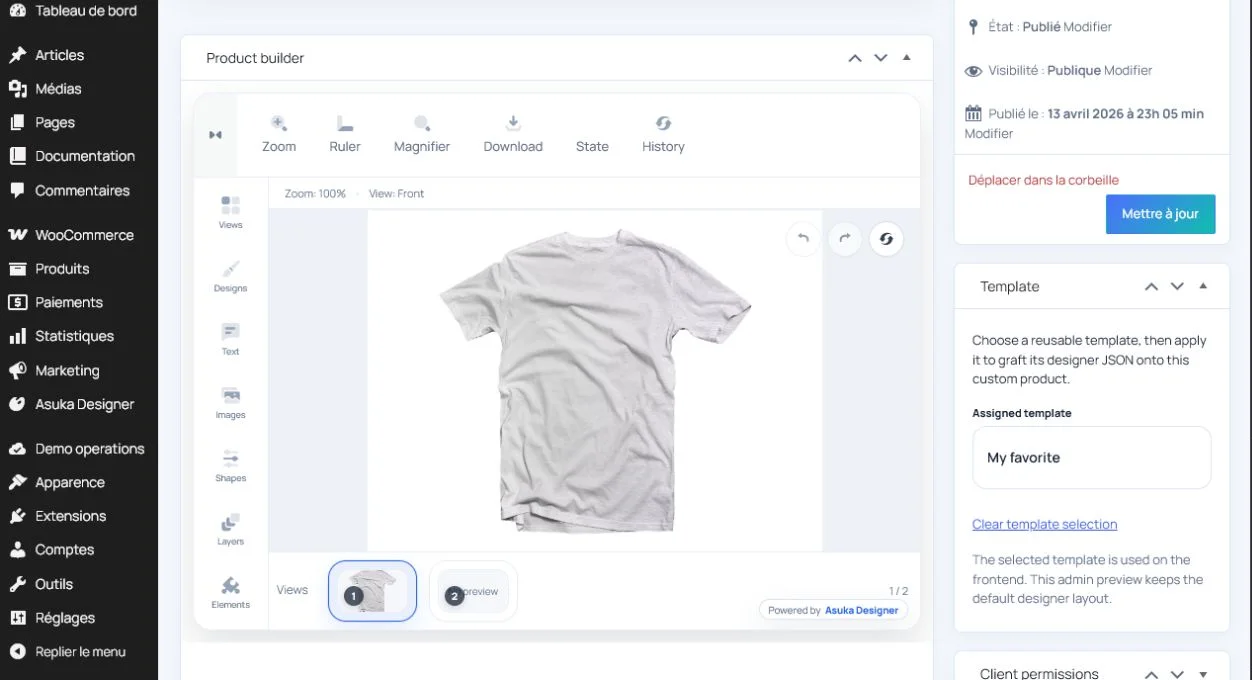
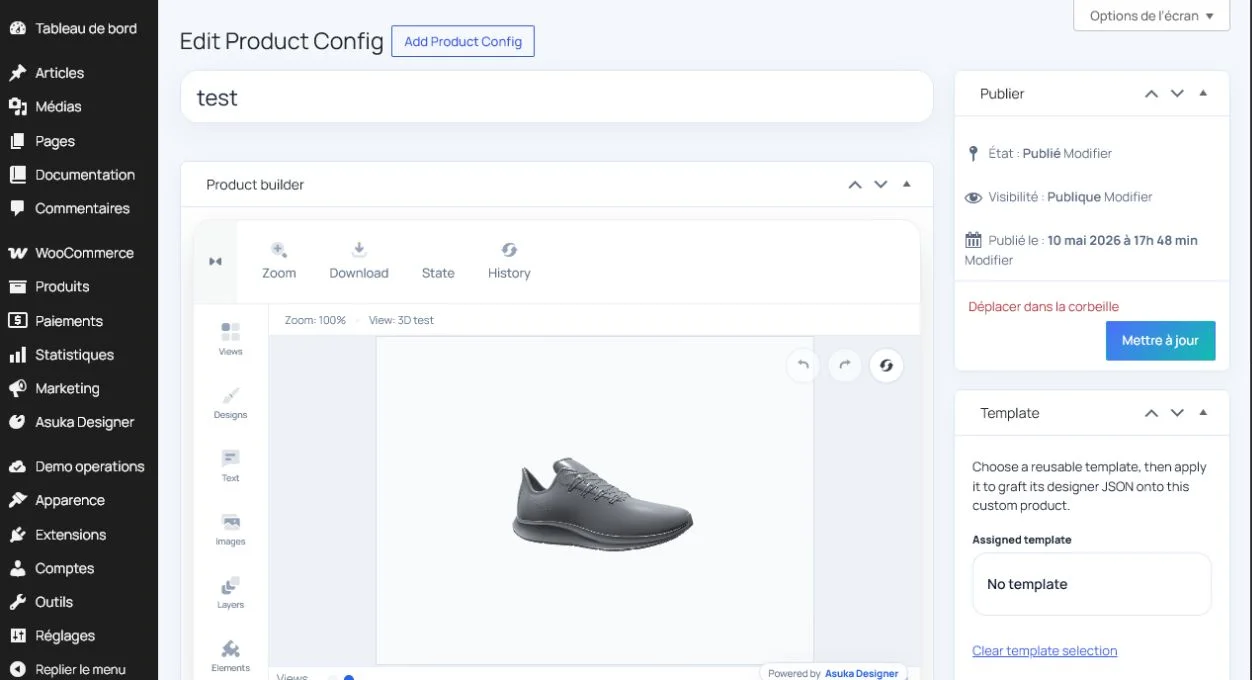
- Create each customer-facing view and give it a stable identifier.
- Add product elements for independently configurable parts.
- Attach variations to the correct element rather than storing every option as an unrelated object.
- Save meaningful camera positions for 3D views.
- Define a loaded product state before customers begin adding content.
Avoid this: After saving, reload the WordPress edit screen immediately. “No views yet” after reload indicates that the current document was not persisted and must be fixed before publishing.
Assign a template
Where to go: Template meta box
A template controls the frontend workspace. Assigning it does not replace the product geometry or artwork.
- Choose an existing Product template.
- Preview the template with the configuration.
- Clear the assignment when the product should use its own layout data.
- Remember that the admin builder may retain a stable authoring layout while the storefront uses the selected template.
Set client permissions
Where to go: Client permissions meta box
Permissions answer “may the customer do this?” Modules answer “where can the customer open the tool?” Both must allow the workflow.
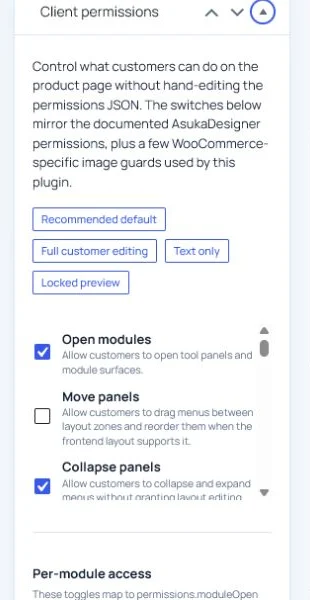
- Basic creation: text, images, designs, shapes, colors, layers, and views.
- Selection operations: move, scale, rotate, duplicate, delete, lock, hide, and reorder.
- Text operations: edit content, font family, formatting, and curve.
- Output operations: download current view, all views, selected objects, drawing zones, or JSON.
- Administrative operations such as creating drawing areas, markers, elements, or pricing rules should normally stay disabled for customers.
Tip: When a visible module appears empty, check its permission requirements before assuming the module is broken.
Configure validation guards
Where to go: Validation guards meta box
Validation blocks invalid customer designs before cart or export.
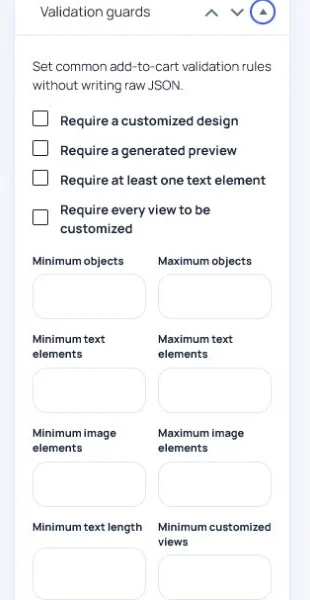
- Require content or completed views when the product cannot be ordered blank.
- Enforce drawing-area containment.
- Set physical width, height, or area limits after calibration.
- Set minimum effective DPI for customer images.
- Restrict colors and printing methods to supported production combinations.
Success check: An invalid test design produces a clear customer message and cannot silently reach checkout.
Filter catalogs and attach pricing rules
Where to go: Catalog filters and Pricing rules meta boxes
The global libraries may contain many entries. Product filters expose only the relevant subset.
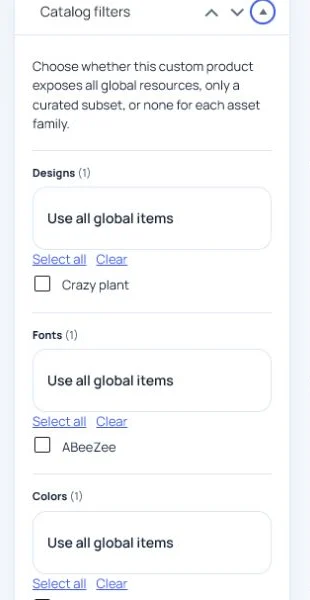
- Select the designs, fonts, colors, printing methods, and shapes allowed for this product.
- Leave a catalog unrestricted only when every enabled global item is appropriate.
- Attach reusable pricing rules in an intentional order.
- Test rule combinations with the actual product quantity and dimensions.
Use Config audit and View pagination
Where to go: Config audit and View pagination meta boxes
The audit highlights malformed or contradictory configuration. Pagination controls how larger view sets are presented.
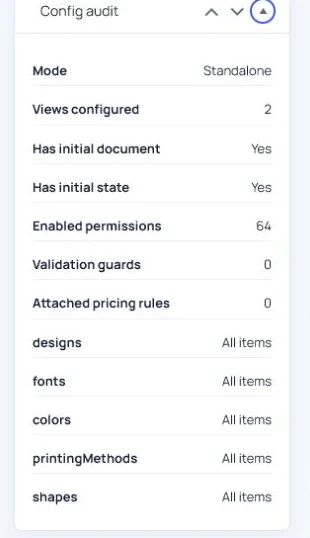
- Resolve invalid JSON and missing identifiers.
- Confirm linked assets and template references exist.
- Use pagination when many views would make the switcher difficult to scan.
- Retest mobile navigation after changing view pagination.
Save, reload, and publish
A reliable save sequence is part of product authoring, not an optional final check.
- Click Update and wait for WordPress to complete the request.
- Reload the edit page.
- Confirm the view count, active view, product state, template, and side-panel settings.
- Test undo: the first undo target must be the loaded product, not an empty document.
- Publish, then run QA & Diagnostics and a private storefront test.
Need to verify the result?
Run Asuka Designer > QA & Diagnostics, then repeat the customer workflow in a private browser window.