
Documentation
Elements and Variations
Model configurable product parts and synchronize their choices across 2D and 3D views.
Elements describe the product itself. Layers describe customer-added content. Keeping these concepts separate makes variation synchronization, camera focus, pricing, and production data predictable.
Who this is for
Catalog managers building configurable products
What you will achieve
Selecting any product part opens its own variations, and one variation choice updates every linked view without affecting unrelated parts.
Before you begin
- A list of the product parts customers can change.
- A list of variations for each part.
- Stable IDs agreed across all views.
Choose the right data model
- Product element: a configurable part such as body, handle, sole, or label.
- Variation: an allowed state of that element such as white, blue, leather, or large.
- Layer: customer content such as text, image, design, or shape.
- View: one 2D or 3D representation of the product.
Avoid this: Do not create a separate element for every color. Create one logical element with color variations.
Create stable identifiers
Machine identifiers are the links between renderers and saved designs.
- Use lowercase readable IDs such as body, handle, white, and blue.
- Keep an element ID identical in every view that represents the same real part.
- Keep variation IDs identical when they should synchronize.
- Change customer-facing labels freely, but avoid changing IDs after launch.
Configure variation behavior
- For 2D, connect each variation to the correct product image or element state.
- For 3D, connect it to the correct mesh, material, texture, visibility, or parameter change.
- Set one active/default variation for every required group.
- Use shared root groups when the same choice applies across views.
Configure selection and navigation
The Variations module should follow the element selected directly on the canvas or scene.
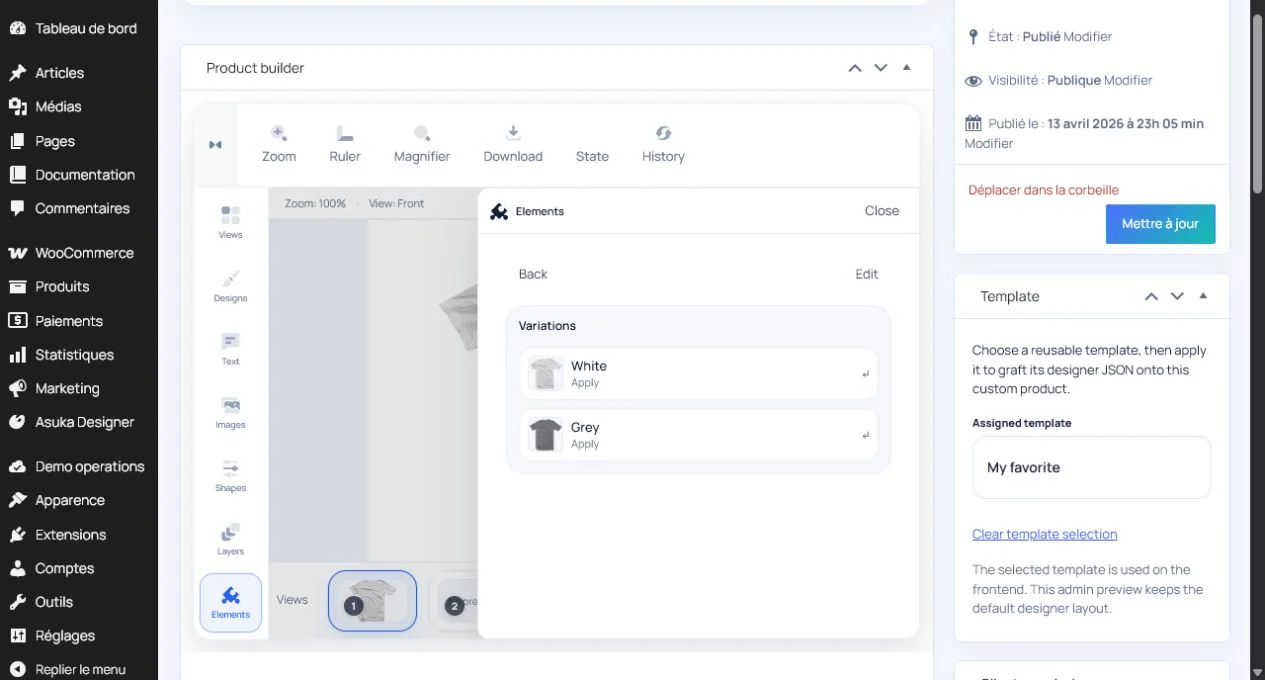
- Enable Elements or Variations in the assigned template.
- Enable the permissions required to view element variations.
- Click one part and confirm its variation group opens automatically.
- Click another part without returning to the root and confirm the module changes to the new part.
- After applying a variation, confirm the selected element does not jump to another part.
Synchronize 2D and 3D views
- Create equivalent element and variation IDs in each relevant view.
- Change a variation in one view.
- Switch to every other view and confirm the product state is already updated.
- Save and reload the customer design to confirm the shared state persists.
- Verify pricing reads the shared variation once rather than charging once per visual representation.
Advanced testing matrix
- Select part A, switch A twice, then select part B and switch B twice.
- Alternate views after every choice.
- Undo and redo each choice.
- Reload the design and compare active variations.
- Return to the variation root and confirm camera and navigation state reset.
Need to verify the result?
Run Asuka Designer > QA & Diagnostics, then repeat the customer workflow in a private browser window.