
Documentation
2D Views
Create image-based product views with precise drawing areas, measurements, layers, and history.
Two-dimensional views use the Fabric renderer and are ideal for flat previews such as apparel fronts, backs, cards, packaging panels, signs, and printable sheets.
Who this is for
Product administrators building image-based products
What you will achieve
A responsive 2D view with correctly scaled product media, constrained customer artwork, and production-ready measurements.
Before you begin
- A clean product image for every view.
- Known real-world printable dimensions when production size matters.
- A decision about which parts need variations.
Create the view and canvas
Where to go: Product builder > Views > Create a view
The canvas is the logical coordinate space. The displayed responsive size may change without changing the stored design coordinates.
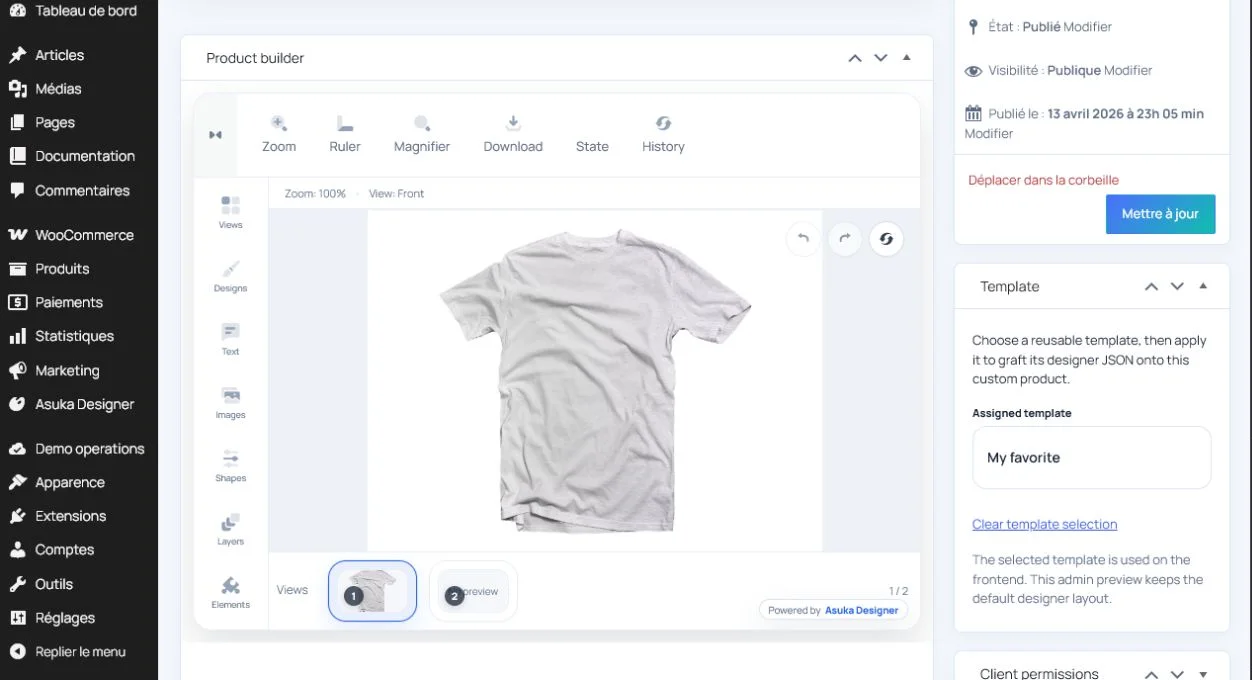
- Choose a descriptive view label and stable ID, such as front or back.
- Upload or select the product image.
- Set a canvas ratio that matches the source image.
- Fit the product visibly without stretching it.
- Choose the initial zoom and active view.
Avoid this: Do not use CSS display size as a physical measurement. Calibrate a drawing area or view when centimeters or inches matter.
Represent configurable product parts
An element represents a product part whose appearance or options may change.
- Use separate elements for independently configurable parts.
- Use variations for color, artwork, or product-state alternatives.
- Reuse the same element ID in related views when the selection should synchronize.
- Keep customer artwork as layers, not as product elements.
Create drawing areas
Where to go: Drawing Areas module
A drawing area describes where customer content may exist. It can also provide the physical reference used by measurement and DPI validation.
- Draw or configure the permitted region.
- Give every area a clear name such as Front chest.
- Set physical width and height with the correct unit.
- Choose whether the entire object or only its center must remain inside.
- Attach layers to the intended area when several areas exist.
Success check: Dragging a layer toward an edge keeps it inside the assigned area and the Transform information reports consistent real dimensions.
Understand real measurements
A measured layer can expose native, relative, and physical dimensions at the same time.
- Native is the width and height in canvas coordinates.
- Relative is the percentage of the calibrated reference.
- Physical is the production width, height, and area in cm, mm, or inches.
- Changing the responsive display size does not change physical size.
- Changing the calibrated product variation may intentionally change the real measurement.
Tip: Use physical area for area-based pricing and effective DPI for image-quality warnings.
Establish the initial history state
History must begin after the product image, elements, and initial customer layers are loaded.
- Save the completed initial document.
- Reload the builder and wait for the active view to be ready.
- Change a variation or move one layer.
- Undo once and confirm the loaded product returns.
- Redo and confirm the customer change returns.
Test the finished 2D view
- Desktop, tablet, and narrow mobile layouts.
- Text creation, font family, formatting, and curved text.
- Image upload, external provider, design, and shape insertion.
- Selection, drag, scale, rotate, duplicate, delete, lock, and layer order.
- Drawing-area boundaries, DPI warnings, pricing, undo, redo, and view switching.
- Save/reload in administration and cart/checkout on the storefront.
Need to verify the result?
Run Asuka Designer > QA & Diagnostics, then repeat the customer workflow in a private browser window.