
Documentation
Getting Started
Install the plugin, connect the license, and publish a first customizable WooCommerce product.
Follow this guide if Asuka Product Designer is new to you. It explains the shortest safe route from plugin activation to a test order without assuming that you already know product configurators.
Who this is for
Store owners and first-time administrators
What you will achieve
A published product that opens the designer, accepts a valid design, and reaches a WooCommerce order.
Before you begin
- WordPress 6.6 or newer and PHP 8.1 or newer.
- WooCommerce when the designer will be attached to products and orders.
- An AsukaDesigner license key when premium modules are required.
- Administrator access and permission to upload media.
Good to know: Use a staging site for the first setup. A configuration can be edited later, but testing checkout and production is safer away from a live store.
1. Install and activate the plugin
Where to go: WordPress > Plugins > Add New > Upload Plugin
Upload the official ZIP without extracting it. Activate Asuka Product Designer after WordPress confirms the installation.
- Open the ZIP only to verify its origin; upload the original archive to WordPress.
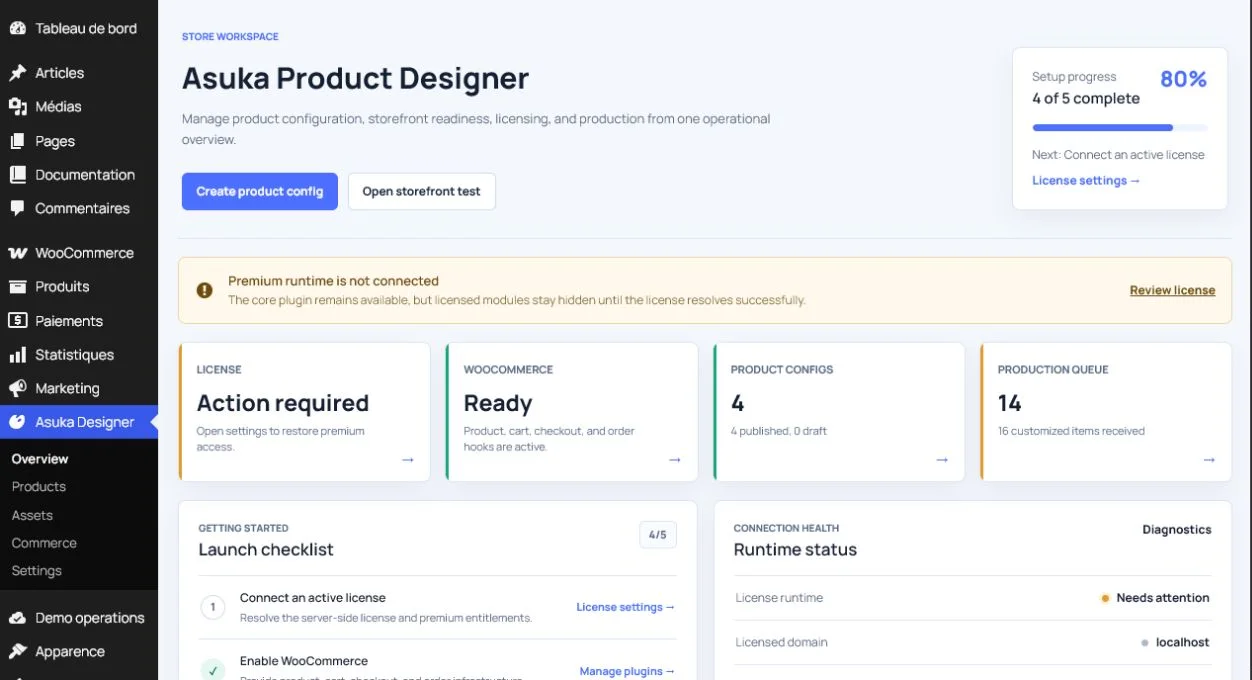
- After activation, locate the new Asuka Designer entry in the WordPress sidebar.
- Open Overview and confirm that the plugin and bundled designer versions are displayed.
- If WooCommerce is installed, confirm the WooCommerce status is shown as ready.
Success check: The Overview page loads without a fatal error and shows the launch checklist.
2. Connect the commercial license
Where to go: Asuka Designer > Settings > Licensing and Symfony API
The key is stored by WordPress on the server. Customers never receive it; the browser receives a short-lived signed token that only contains the authorized features and limits.
- Keep Enable commercial license runtime enabled.
- Paste the license key and leave the domain override empty for a normal installation.
- Use the production API URL unless this is an explicitly configured local development site.
- Save the settings, then verify License status: Connected, the resolved plan, and the licensed add-on count.
Avoid this: A JavaScript query parameter cannot grant premium access. A premium module needs both a signed entitlement and its add-on file.
3. Prepare the minimum shared catalog
Where to go: Asuka Designer > Assets
Shared assets are created once and reused by many products. Begin with a small, controlled catalog so the first product remains easy to test.
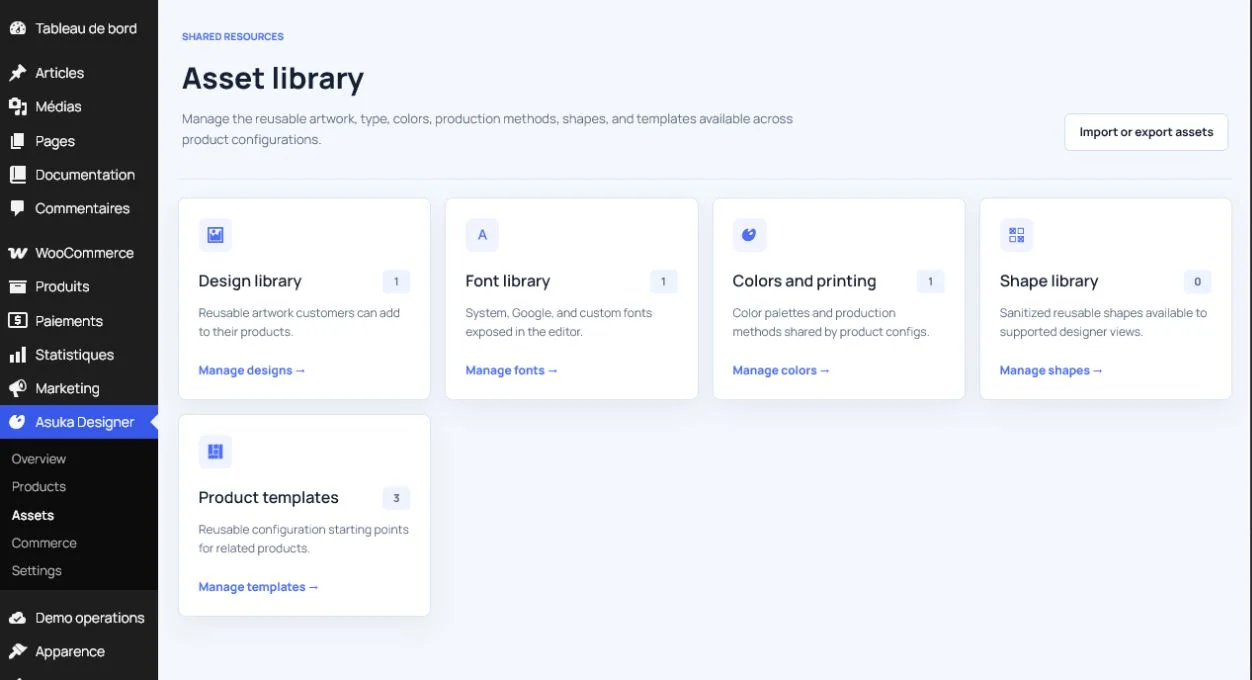
- Add one system font and verify it is marked visible.
- Create one printing method, such as Direct to garment.
- Create two or three colors and associate them with that printing method.
- Optionally add one reusable design and one shape.
Tip: Create the printing method before the colors. The color editor can then show the real compatibility choices immediately.
4. Create the first product configuration
Where to go: Asuka Designer > Products > Add Product Config
A product configuration is the complete source of truth for the designer: views, product parts, variations, editable regions, permissions, modules, pricing, and initial state.
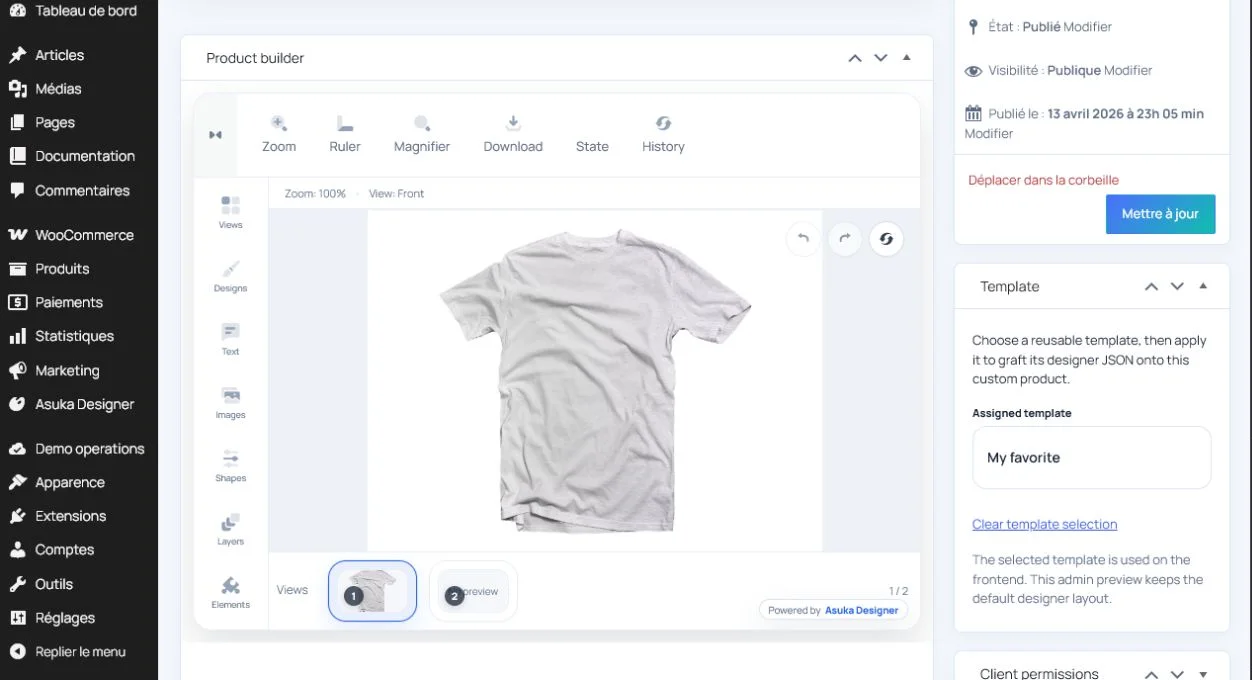
- Give the configuration an internal title that identifies the product clearly.
- Create one 2D view with a product image, or one 3D view with a GLB model.
- Add an editable area when customer artwork must remain inside a printable region.
- Select a template or keep the default workspace for the first test.
- Save, reload the page, and confirm the view is still present.
- Publish the configuration only after the reload check succeeds.
Success check: The product builder reloads with the same view count, product artwork, and configured areas.
5. Bind the configuration to WooCommerce
Where to go: WooCommerce > Products > Edit product > Asuka Designer panel
Binding tells the plugin which designer configuration belongs to the product being purchased.
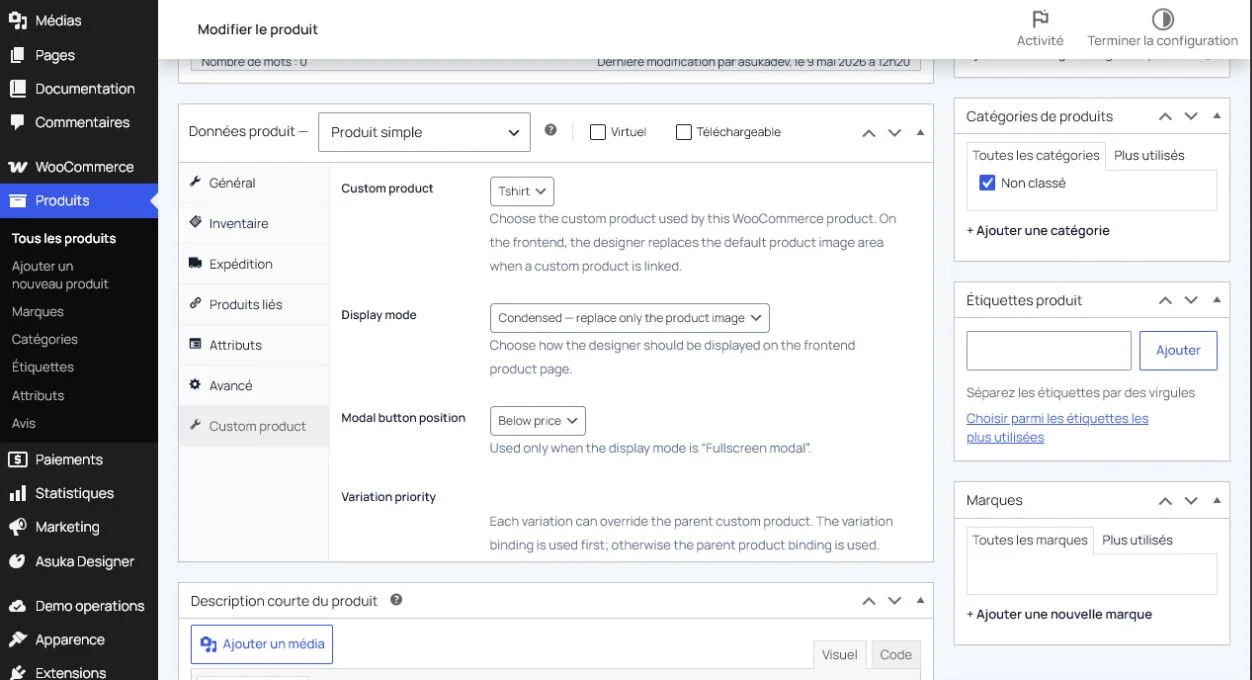
- Select the published configuration.
- Choose the display mode appropriate for the product page.
- Update the WooCommerce product.
- Open the customer product page in a private browser window.
- Create a small design and add the product to the cart.
Avoid this: Do not use the shortcode as a replacement for normal WooCommerce product binding unless the page is intentionally custom-built.
6. Place and inspect a test order
Where to go: Storefront, then Asuka Designer > Commerce > Production
A successful canvas preview is not the end of the test. The design must survive cart refresh, checkout, order creation, and production review.
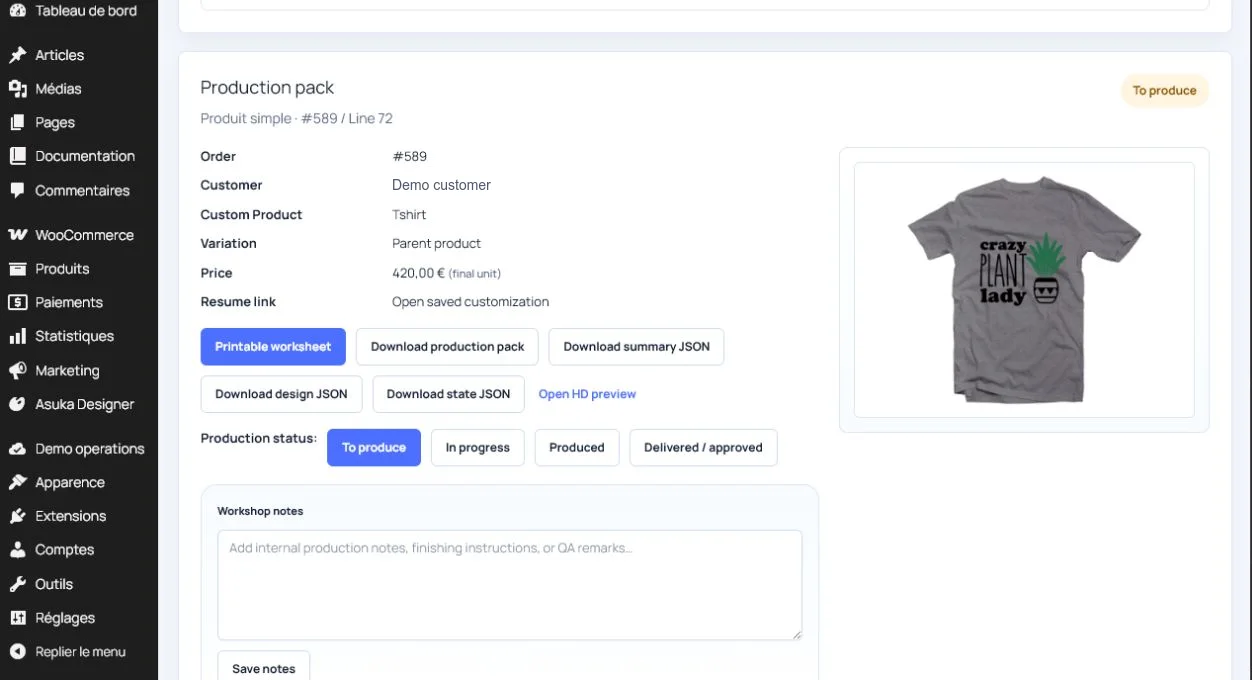
- Confirm the cart contains the preview and customization reference.
- Change quantity and verify the calculated total remains correct.
- Complete checkout using a test payment method.
- Open the order and inspect the customized line item.
- Open Production and verify the preview, design state, price snapshot, and production pack.
Success check: The production workspace can identify the exact configuration and design used by the ordered item.
Need to verify the result?
Run Asuka Designer > QA & Diagnostics, then repeat the customer workflow in a private browser window.